Can Read File In Mac App Assets
/Library/Application Support is a way better place to store your files. Use this directory to store all app data files except those associated with the user’s documents. For example, you might use this directory to store app-created data files, configuration files, templates, or other fixed or modifiable resources that are managed by the app. On your Mac, click the Finder icon in the Dock to open a Finder window. Select the file, then choose File Get Info. You can also Control-click the file, then choose Get Info. In the Info window, click the disclosure triangle next to “Open with.” Click the pop-up menu, then choose the app.
- Can Read File In Mac App Assets Online
- Can Read File In Mac App Assets Free
- Can Read File In Mac App Assets Download
On your Mac, select an item, then choose File Get Info. Click the lock icon to unlock it. Enter an administrator name and password. In the Sharing & Permissions section, do any of the following: Add a user or group: Click the Add button below the list, select a user or group, then click Select. Remove a user or group: Select the user or group, then click the Remove button below the list. Export the Composition for Previewing. You can also save your composition to a.reality or.usdz file for use as a lightweight AR Quick Look experience in your app or on the web. This allows users to place and preview content in the real world to get a quick sense of what it’s like. Apple on Monday debuted a beta version of Reality Converter, a Mac app that allows developers to convert, view and customize USDZ 3D objects using a simple drag-and-drop interface.
Universal Windows Platform (UWP) apps can access certain file system locations by default. Apps can also access additional locations through the file picker, or by declaring capabilities.
The locations that all apps can access
When you create a new app, you can access the following file system locations by default:
Application install directory
The folder where your app is installed on the user's system.
There are two primary ways to access files and folders in your app's install directory:
You can retrieve a StorageFolder that represents your app's install directory, like this:
You can then access files and folders in the directory using StorageFolder methods. In the example, this StorageFolder is stored in the
installDirectoryvariable. You can learn more about working with your app package and install directory from the App package information sample on GitHub.You can retrieve a file directly from your app's install directory by using an app URI, like this:
When GetFileFromApplicationUriAsync completes, it returns a StorageFile that represents the
file.txtfile in the app's install directory (filein the example).The 'ms-appx:///' prefix in the URI refers to the app's install directory. You can learn more about using app URIs in How to use URIs to reference content.
In addition, and unlike other locations, you can also access files in your app install directory by using some Win32 and COM for Universal Windows Platform (UWP) apps and some C/C++ Standard Library functions from Microsoft Visual Studio.
The app's install directory is a read-only location. You can't gain access to the install directory through the file picker.
Application data locations
The folders where your app can store data. These folders (local, roaming and temporary) are created when your app is installed.
There are two primary ways to access files and folders from your app's data locations:
Use ApplicationData properties to retrieve an app data folder.
For example, you can use ApplicationData.LocalFolder to retrieve a StorageFolder that represents your app's local folder like this:
If you want to access your app's roaming or temporary folder, use the RoamingFolder or TemporaryFolder property instead.
After you retrieve a StorageFolder that represents an app data location, you can access files and folders in that location by using StorageFolderApple built in apps on a mac pro. methods. In the example, these StorageFolder objects are stored in the
localFoldervariable. You can learn more about using app data locations from the guidance on the ApplicationData class page, and by downloading the Application data sample from GitHub.You can retrieve a file directly from your app's local folder by using an app URI, like this:
When GetFileFromApplicationUriAsync completes, it returns a StorageFile that represents the
file.txtfile in the app's local folder (filein the example).The 'ms-appdata:///local/' prefix in the URI refers to the app's local folder. To access files in the app's roaming or temporary folders use 'ms-appdata:///roaming/' or 'ms-appdata:///temporary/' instead. You can learn more about using app URIs in How to load file resources.
In addition, and unlike other locations, you can also access files in your app data locations by using some Win32 and COM for UWP apps and some C/C++ Standard Library functions from Visual Studio.
You can't access the local, roaming, or temporary folders through the file picker.
Removable devices
Additionally, your app can access some of the files on connected devices by default. This is an option if your app uses the AutoPlay extension to launch automatically when users connect a device, like a camera or USB thumb drive, to their system. The files your app can access are limited to specific file types that are specified via File Type Association declarations in your app manifest.
Of course, you can also gain access to files and folders on a removable device by calling the file picker (using FileOpenPicker and FolderPicker) and letting the user pick files and folders for your app to access. Learn how to use the file picker in Open files and folders with a picker.

Note
For more info about accessing an SD card or other removable devices, see Access the SD card.
Locations that UWP apps can access
User's Downloads folder
The folder where downloaded files are saved by default.
By default, your app can only access files and folders in the user's Downloads folder that your app created. However, you can gain access to files and folders in the user's Downloads folder by calling a file picker (FileOpenPicker or FolderPicker) so that users can navigate and pick files or folders for your app to access.
You can create a file in the user's Downloads folder like this:
DownloadsFolder.CreateFileAsync is overloaded so that you can specify what the system should do if there is already an existing file in the Downloads folder that has the same name. When these methods complete, they return a StorageFile that represents the file that was created. This file is called
newFilein the example.You can create a subfolder in the user's Downloads folder like this:
DownloadsFolder.CreateFolderAsync is overloaded so that you can specify what the system should do if there is already an existing subfolder in the Downloads folder that has the same name. When these methods complete, they return a StorageFolder that represents the subfolder that was created. This file is called
newFolderin the example.
If you create a file or folder in the Downloads folder, we recommend that you add that item to your app's FutureAccessList so that your app can readily access that item in the future.
Accessing additional locations
In addition to the default locations, an app can access additional files and folders by declaring capabilities in the app manifest or by calling a file picker to let the user pick files and folders for the app to access.
Apps that that declare the AppExecutionAlias extension have file-system permissions from the directory that they are launched from in the console window, and downwards.
The following table lists additional locations that you can access by declaring one or more capabilities and using the associated Windows.Storage API.
| Location | Capability | Windows.Storage API |
|---|---|---|
| All files that the user has access to. For example: documents, pictures, photos, downloads, desktop, OneDrive, etc. | broadFileSystemAccess This is a restricted capability. Access is configurable in Settings > Privacy > File system. Because users can grant or deny the permission any time in Settings, you should ensure that your app is resilient to those changes. If you find that your app does not have access, you may choose to prompt the user to change the setting by providing a link to the Windows 10 file system access and privacy article. Note that the user must close the app, toggle the setting, and restart the app. If they toggle the setting while the app is running, the platform will suspend your app so that you can save the state, then forcibly terminate the app in order to apply the new setting. In the April 2018 update, the default for the permission is On. In the October 2018 update, the default is Off. If you submit an app to the Store that declares this capability, you will need to supply additional descriptions of why your app needs this capability, and how it intends to use it. This capability works for APIs in the Windows.Storage namespace. See the Example section at the end of this article for an example of how to enable this capability in your app. Note: This capability is not supported on Xbox. | n/a |
| Documents | documentsLibrary Note: You must add File Type Associations to your app manifest that declare specific file types that your app can access in this location. Use this capability if your app: - Facilitates cross-platform offline access to specific OneDrive content using valid OneDrive URLs or Resource IDs - Saves open files to the user's OneDrive automatically while offline | KnownFolders.DocumentsLibrary |
| Music | musicLibrary Also see Files and folders in the Music, Pictures, and Videos libraries. | KnownFolders.MusicLibrary |
| Pictures | picturesLibrary Also see Files and folders in the Music, Pictures, and Videos libraries. | KnownFolders.PicturesLibrary |
| Videos | videosLibrary Also see Files and folders in the Music, Pictures, and Videos libraries. | KnownFolders.VideosLibrary |
| Removable devices | removableStorage Note You must add File Type Associations to your app manifest that declare specific file types that your app can access in this location. Also see Access the SD card. | KnownFolders.RemovableDevices |
| Homegroup libraries | At least one of the following capabilities is needed. - musicLibrary - picturesLibrary - videosLibrary | KnownFolders.HomeGroup |
| Media server devices (DLNA) | At least one of the following capabilities is needed. - musicLibrary - picturesLibrary - videosLibrary | KnownFolders.MediaServerDevices |
| Universal Naming Convention (UNC) folders | A combination of the following capabilities is needed. The home and work networks capability: - privateNetworkClientServer And at least one internet and public networks capability: - internetClient - internetClientServer And, if applicable, the domain credentials capability: - enterpriseAuthentication Note: You must add File Type Associations to your app manifest that declare specific file types that your app can access in this location. | Retrieve a folder using: StorageFolder.GetFolderFromPathAsync Retrieve a file using: StorageFile.GetFileFromPathAsync |
Example
This example adds the restricted broadFileSystemAccess capability. In addition to specifying the capability, the rescap namespace must be added, and is also added to IgnorableNamespaces.
Note

For a complete list of app capabilities, see App capability declarations.
Adding Images
To help you create and manage user interface elements for your app, Xcode offers several tools in addition to Interface Builder.
You create many images for your app, including icons, custom artwork, and the launch screens for different iOS devices. Some of these images are required for App Store submission. The asset catalog helps you manage them.
With the particle emitter editor, you can enhance your app by adding animation effects involving moving particles such as snow, sparks, and smoke. These effects are especially useful in games for iOS and Mac.
Adding App Icons and Launch Images
Create app icons for all of the operating system versions and devices that your app supports. iOS, watchOS, and OS X apps require different types of icons. For any platform, add the required versions of your app icons to an asset catalog in Xcode.
For an iOS app, create an icon to be displayed on a device’s Home screen and in the App Store. Xcode doesn’t include graphics tools for creating icons; use a graphic design app. Create several different versions of the icon for use in different situations. Your iOS app can include a small icon (to use when displaying search results) and a high-resolution icon (for devices with Retina displays). If your iOS app’s target is universal, you also create versions of the icon for iPad and iPhone devices.
I also clicked the buttons to lock the Mac and erase the Mac. I’m going to guess that these measures will be useless, but I did them anyway. Let me elaborate on why.I think these measures will be useless because my laptop is both protected by a password when it’s either awoken from sleep mode or restarted. Also, my laptop’s hard drive is full encrypted using the Mac’s operating system’s built-in feature. 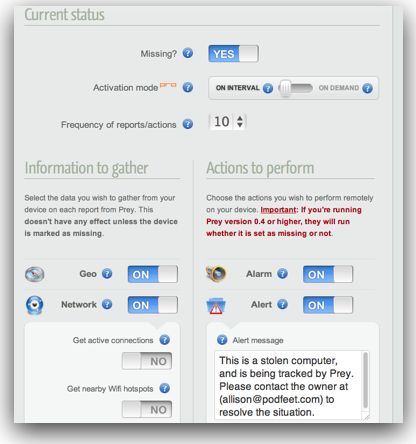 I checked the box labeled “Notify me when found”.
For a watchOS app, create icons for the home screen and any other interfaces you support such as notifications or long looks.
For an OS X app, create a set of icons, consisting of pairs of icons (standard and high resolution) for each icon size, in pixels: 16 x 16, 32 x 32, 128 x 128, 256 x 256, and 512 x 512. The Finder uses these icons to represent your app to the user.
Work with Image Assets in the Asset Catalog
When you create a new project, Xcode creates an asset catalog named Assets.xcassets. Select the asset catalog from the project navigator, and Xcode opens the catalog in the editor area.
The asset catalog contains a list of image sets. Each image set, such as AppIcon in the screenshot, contains all the versions of an image that are necessary to support various devices and scale factors. You can add icon images to your app by dragging them to the appropriate cell in the icon set grid.
You can create additional image sets, such as for buttons and other controls in your app. To create an empty image set or to import images into a new set, click the Add button (+) at the bottom of the image set list. You can add folders to organize the items in the catalog. Asset catalogs also support other types such as Sprite Atlases, Watch Complications, and Data files.
Create and Set the iOS Launch Screen File
A launch screen is displayed while your app is launching on an iOS device. The launch screen is displayed as soon as the user taps your app icon, and it stays on the screen until your main interface is displayed. If your app is running on iOS 8 or later, the system uses a launch screen from a storyboard file and sizes it appropriately for the screen. For deployment targets prior to iOS 8, you add a set of launch images to an asset catalog for each of the possible screen sizes.
Can Read File In Mac App Assets Online
New projects are created with a launch screen storyboard file called LaunchScreen.storyboard. Alternatively, you can create a new launch screen file using File > New, selecting the User Interface category, and choosing a file type of Launch Screen. The launch screen uses size classes to adapt to different screen sizes and orientations; see Building for Multiple Screen Sizes for more information.
Because the launch screen is shown before your app is running, you can only use a single root view of type UIView or UIViewController. You are also limited to UIKit classes that do not require updating. For more information, see Creating a Launch Screen File.
To set the launch screen, open the General information tab for your target, and select the launch screen file from the pop-up menu.
For more help icons, launch images, and the asset catalog, see Xcode Help.
Create and Set iOS Launch Images for iOS 7 and Earlier
You can easily capture screenshots for launch images on a device. On the device, configure the screen the way you want it to appear. Then press the device Lock and Home buttons simultaneously. Your screenshot is saved in the Saved Photos album in the Photos app. Copy the screenshot from the device to your Mac. You can use the iPhoto app, for example, to import the screenshot from the device and then export the screenshot to your Mac as a PNG file.
Can Read File In Mac App Assets Free
To set the screenshot as a launch image, select the asset catalog file in the project navigator, and select the LaunchImage set. Drag your screenshot to the appropriate cell in the grid.
For more information on help icons, launch images, and the asset catalog, see Xcode Help.
Can Read File In Mac App Assets Download
Copyright © 2018 Apple Inc. All rights reserved. Terms of Use Privacy Policy Updated: 2016-10-27